Assignment Listing Screen Landing Page
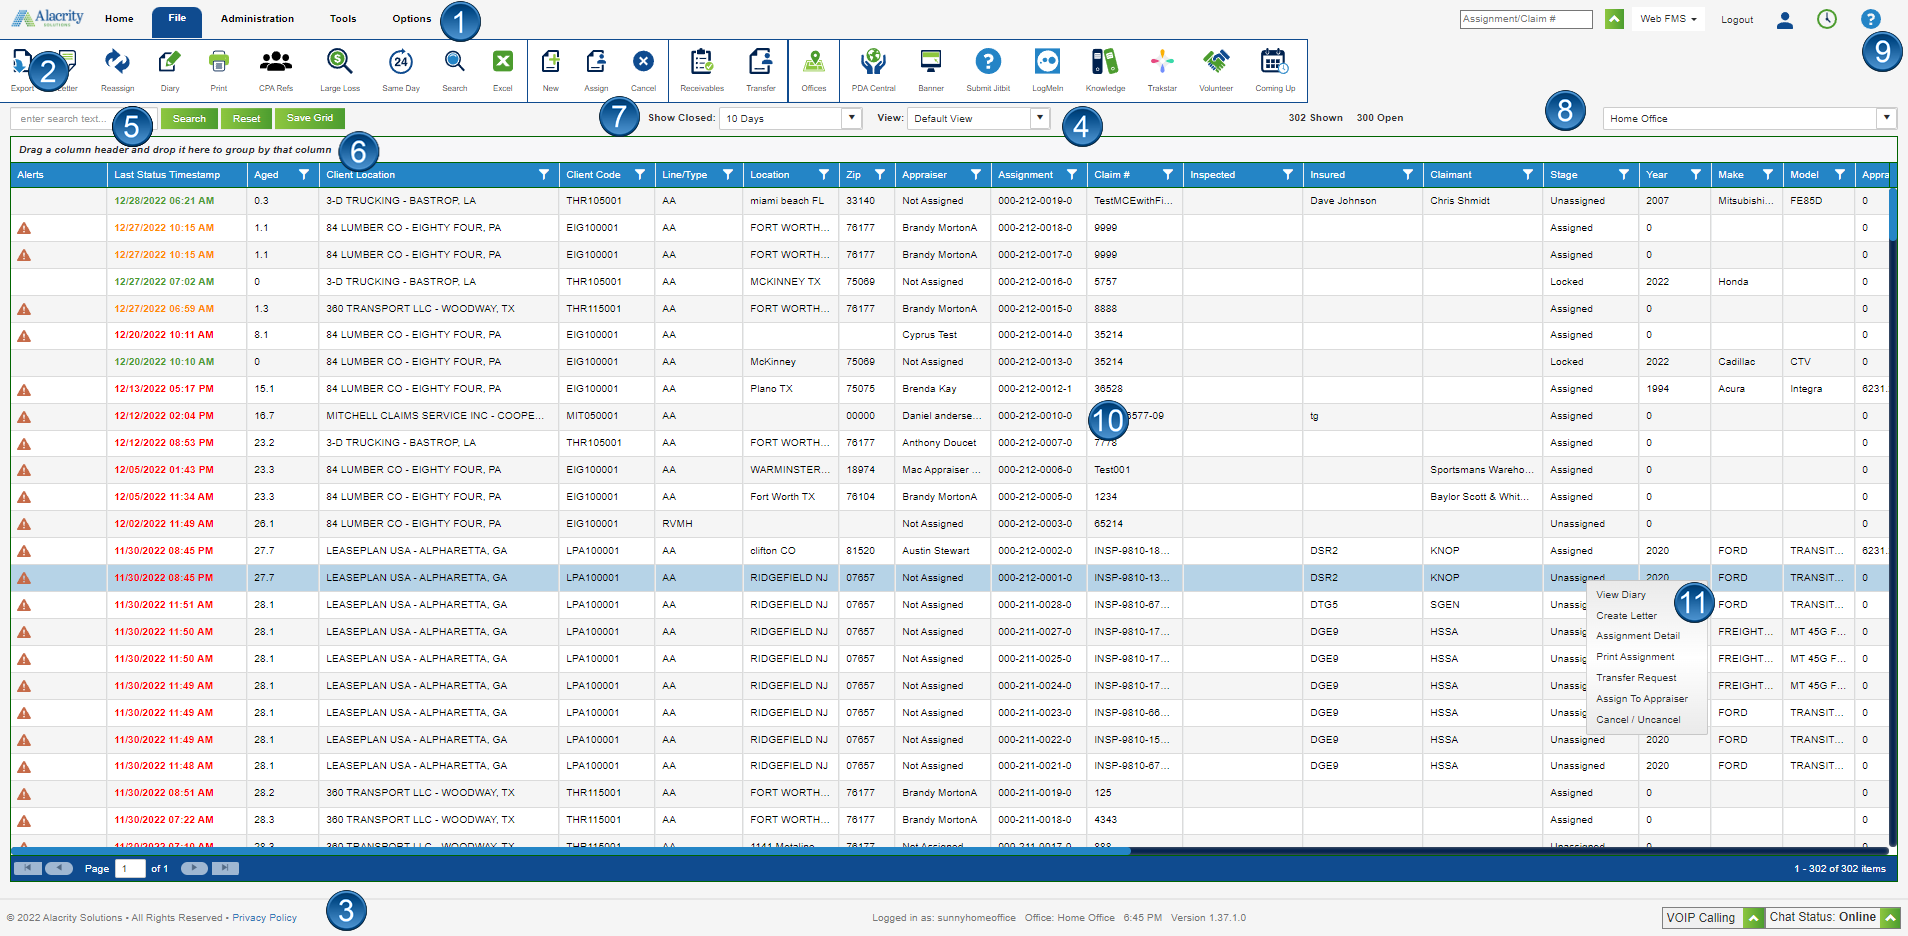
The application opens up to the Assignment Listing screen. The image below indicates where specific items are located on this screen.
Assignment Listing Screen and its Components
After you log on to the WebFMS application, the Assignment Listing appears. Assignments for the selected Office appear in the grid. Any time data appears in a grid presentation,
users can perform several specific actions, such as search, sort, filter, and group data within the grid. Also, users can export data to Excel by using the Export to Excel icon
either in the Menu ribbon or available as an icon shortcut on many screens.
The Assignment Listing has these components:
1 — Menu Tab Selections
Selections include File, Administration, Tools, and Options.
2 — Menu Ribbon
The icons on the ribbon vary based on the Menu selection as well as user permissions.
Possible Ribbons are:
3 — The Version Number and Copyright appears on the bottom border ribbon of the screen.
4 — Adjust Grid Views
This drop down allows the user to view the assignment grid through different views, such as 'Default View', 'Appraiser View', 'Extended View', and 'Custom View'. Also, this drop down allows users to access the 'Map View' and 'Franchisee Dashboard' depending on their user level.
Note: 1099 appraisers cannot claim Scoper/Writer assignments in the Writer Queue for corporate stores.
5 — Use the grid's features to search, sort, filter, and group data within the grid. A reset button has been added to reset search to list all of the assignments in the grid.
Note: This grid, as well as all other grids in the application only show the first two-hundred rows of data, per page.
6 — Save Grid Settings:
Arrange the columns in the grid by dragging and dropping them in place. Once they are arranged the way you want, click the Save Grid Settings button.
7 — The Show Closed dropdown enables the system to show closed Assignments within a certain amount of days from the current date, as specified.
8 — Office Dropdown Box
Easily switch from Office to Office for multi-office owners and Home Office users.
9 — Help Icon
Every screen contains the Help icon. Click on it to access the application's Help files.
10 — Assignment Listing Area
The Assignment Listing shows all current, open Assignments.
Last Status Column — The last status column is color-coded with the following colors:
- Green — Indicates that the Assignment is OK and the Client does not need any information about it.
- Orange — The Assignment is currently OK but in X hours (depending on Business Group/Line/Service Type) will be passed time due for updating the Client.
- Red — The Assignment has passed the time for updating the Client.
These status times are determined by the CPA for a given Assignment, if available. If not, the system defaults to PDA Standards.
11 — The Context menu appears when you right-click a single row on the grid.